Erin McDonnell, IDS
Interior Designer
How to make a reclaimed wood accent wall: Design Group of Philadelphia has it in the works!

Tools you will need: Hammer, Gloves, Pry Bar, 1 Thick Block of Wood, Hand Sander, Wood Stain, and Several Shipping Pallets.
If you are going for a rustic and chic look for a room, creating a reclaimed wood accent wall can transform the space from a rather normal experience to an exciting, warm, unique and sophisticated look. Here at Design Group of Philadelphia we’ve been working hard at trying to achieve this look for a client at a very low cost, and so it says “practice makes perfect” I feel as though we’ve got the technique down!
Usually, you can purchase from various manufacturers “peel and stick” reclaimed wood specifically for accent walls; which obviously is much easier, but can cost you an arm and a leg. Especially if you have over 100 square feet of wall to cover. So, as badass, go gettin’ chicks that we are, we decided to take matters into our own hands.
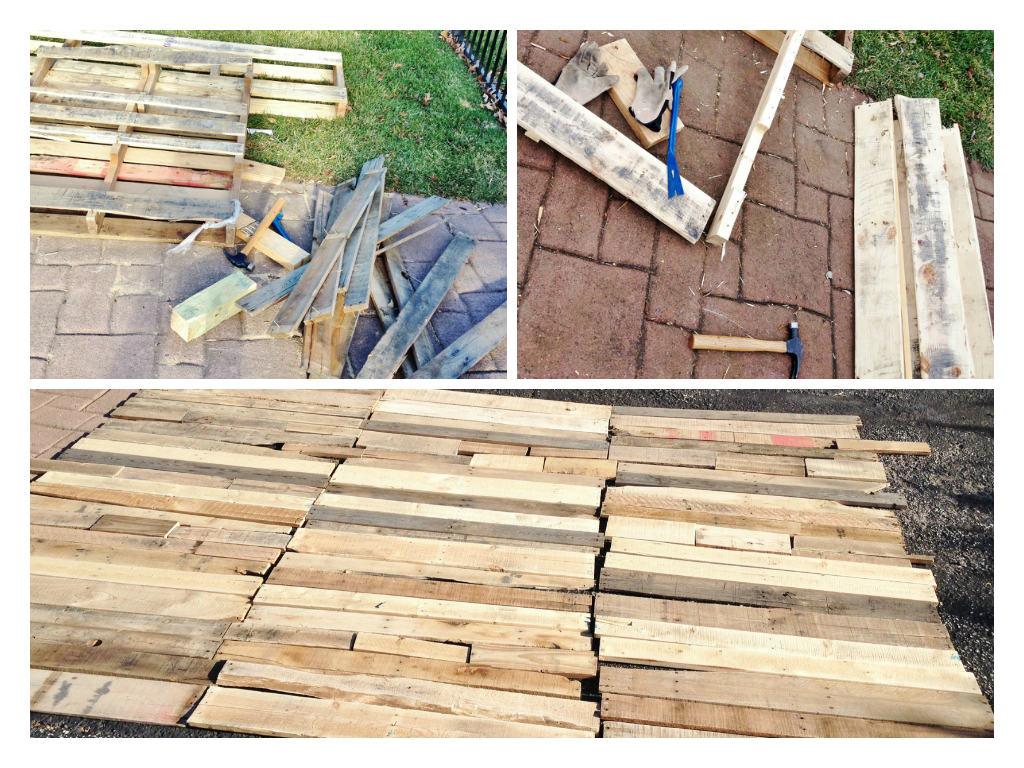
The majority of the project is almost done. We’ve got the pallets broken down and the sanding complete, all there is to do now is stain the reclaimed wood before it gets mounted. Here are some tips on the progression of this project. . .
The hardest part of the job is collecting old shipping pallets. If you can find a good resource who will give them away for free, half the trouble is over. Once you obtain the materials then all that’s left is just the manual labor. When I first began, I realized that simply prying the planks off with the hammer and pry bar wasn’t going to do it. Not only was it physically exhausting, it also was splitting the nice pieces of wood and every split gives me a little less square footage to work with. So keeping the integrity of the plank is important. With a little trial and error I found out a pretty easy technique that enabled me to take apart the pallet more efficiently and effectively. I mentioned in the materials needed 1 thick block of wood, this will be your best friend. If you take your pallet and you can manage to pry at least a few planks on one side off, the rest will be hammered off with your block of wood and a hammer. You can do this by leaning your pallet over another pallet (see photo as reference) and placing your block of wood as if it were wedged right along- side of the piece of wood it’s nailed into. Take your hammer and hammer down on the block of wood, this should push out the nails gradually without damaging the beautiful piece of wood you are trying to take apart. Repeat this for every section of the plank that is nailed down. Some pallets will be easier to dismantle than others, if the block doesn’t seem to work for those hard-to-get nails then the pry bar should do the trick, it just might take a little more elbow grease. Once you get enough planks loose you’ll have to hammer out the nails so that the sanding process will be easier and safer. If you lay the plank down on a work station and hammer the pointy side down, flip it over and then you can use your hammer to pluck the nail head out on the opposite side.
Once, the nails are out, I used a hand sander with a fine grit (so that we don’t remove any of that gorgeous natural wood texture) and sanded one side and its edges, just enough to get the splinters out. This will make the staining process much easier. I have included some photos of our pallets and the progress we are making. Stay tuned for more photos and tips as we conclude the project.
- Log in to post comments